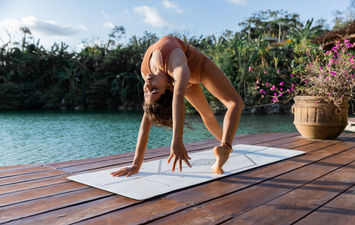
What Is Restorative Yoga?
Restorative Yoga is a gentle practice that uses a variety of props to support your body while it opens through passive stretching. Restorative poses, which may be held for five or more minutes, counterbalance more active, flowing styles of yoga and other movement practices.
What to Expect in a Restorative Yoga Class
In a yoga studio, Restorative classes often try to set a relaxing mood with dim lighting, aromatherapy, and ambient music. Studios usually have a lot of props on hand, which is great if you like to use three or four bolsters. Since you won’t be moving as much as in a flow class, bring layers to keep warm. Some studios offer tea at the end to keep the cosy vibes going. If you prefer a home practice, you can replicate this atmosphere in your own space and choose the best time for you to wind down.
The Benefits of Restorative Yoga
Relaxation
Restorative Yoga is all about leaning in to relaxation. Using a lot of props to support your body helps you feel safe and supported so you can let go.
Better Sleep
Gentle, passive stretching prepares your body for rest. If you have trouble unwinding at the end of your day, include a few restorative postures into your sleep hygiene routine or time your home session to lead you to bedtime.
Well-Being
Putting time aside for self-care regularly improves your sense of well-being. A consistent Restorative practice makes you feel better.
Better Mood
Clearing your mind and opening your body is a mood elevator. Restorative yoga also helps calm your nervous system so you feel less anxious.
Reduced Pain
Giving tight areas time for passive stretching reduces aches and pains, especially if you do a lot of running or other high-impact activities.
Restorative Yoga Poses
In each pose, take full, deep breaths in and out through your nose. Focus on softening your body and letting yourself open in a supportive space.
Gather all your props before starting a Restorative session. Bolsters are ideal but you can substitute several folded blankets. Blocks also come in handy.

Child’s Pose (Balasana)
Sanskrit Meaning: Bala (Child)
Pose Type: Kneeling Benefits: Stretches the hips, groins, thighs, and feet.
Cautions: Long holds in this pose may not be comfortable for people with knee pain.
Props: Bolster or blankets
Step-by-Step:
- Place your bolster longways on your mat.
- Come into Child’s Pose with your feet on the mat and the bolster under your pelvis, torso, and head.
- Bring your arms alongside your body to either side of the bolster.
- Turn your head to rest one cheek on the bolster.
- Stay for five to ten minutes, turning to the other cheek halfway through.

Supported Wide-Legged Forward Fold (Upavista Konasana)
Sanskrit Meaning: Upavistha (Seated) Kona (Angle)
Pose Type: Seated Forward Fold
Benefits: Stretches the hips and inner thighs.
Props: Bolsters, blankets, block
Step-by-Step:
- Come to sit with your legs extended at a wide angle.
- Place a bolster or two longways between your legs.
- Tip your pelvis forward to come into a forward fold with your torso fully resting on the bolster.
- Stack several bolsters or add blankets for more support. You can also rest your forehead on a block if you like. Cover the block with another blanket to make a softer resting place.
- Stay for five to ten minutes.

Bridge Pose (Setu Bandhasana)
Sanskrit Meaning: Setu (Bridge) Bandha (Lock)
Pose Type: Supine Backbend
Benefits: Stretches the back, abdomen, and shoulders.
Props: Block
Step-by-Step:
- Lie on your back with your knees bent and pointing up toward the ceiling.
- Bring your arms alongside your body.
- Press into your feet to lift your hips.
- Slide a block under your pelvis. Choose the medium or low height for longer holds.
- Lower your sacrum to rest on the block, adjusting the placement if necessary.
- Stay for five to ten minutes, then press into your feet to lift your hips and slide the block out.

Reclined Bound Angle (Supta Baddha Konasana)
Sanskrit Meaning: Supta (Reclined) Baddha (Bound) Kona (Angle)
Pose Type: Supine
Benefits: Opens the hips, groins, and inner thighs.
Props: Bolster, blanket, blocks
Step-by-Step:
- Place a bolster or several folded blankets longways on your mat.
- Come to sit with your butt close to the end of the bolster.
- Bend your knees and open them to either side with the soles of your feet together.
- Place a block under each knee for support.
- Lie back onto your bolster.
- If you feel like you’d like your head to be a little higher, put a block under the end of your bolster to make an incline.
- If you are using a stack of blankets instead of a bolster, it can feel nice to make a little tuck in the top blanket right under your neck.
- Place your hands on your belly or let them fall to either side.
- Stay for five to ten minutes.

Legs Up the Wall Pose (Viparita Karani)
Sanskrit Meaning: Viparita (Inversion) Karani (to do)
Pose Type: Inversion
Benefits: Stretches the backs of the legs, improves circulation and lymphatic drainage.
Precautions: Avoid inversions if you have glaucoma
Props: Block, bolster, blanket, wall
Step-by-Step:
- Bring your mat over to a wall.
- If you have a bolster or blanket, put its long end against the wall at the end of your mat.
- Sit sideways on the bolster with your knees bent and the side of your body touching the wall.
- Roll onto your back keeping your butt on the bolster and your legs up the wall. Adjust as necessary to bring your butt as close to the wall as possible.
- If you are using a block instead, set up in the same way except sitting on your mat instead of the bolster. After you take your legs up the wall, lift your hips to slide the block under your sacrum.
- Stay five to ten minutes, then bend your knees and roll to one side to come out.

Corpse Pose (Savasana)
Sanskrit Meaning: Sava (Corpse)
Pose Type: Supine
Benefits: Deep relaxation
Props: Bolster, blankets
Step-by-Step:
- Lie on your back with your palms turned up and your feet falling out to either side.
- Take a bolster or rolled-up blanket under your knees.
- For extra grounding, place a folder blanket or two on top of your thighs or over your pelvis.
- Use more blankets to keep warm if the room is chilly.
Restore More
As with any yoga routine, the more consistent you are with it the more benefits you’ll see. Take a regular Restorative class at your favourite studio and you’ll undoubtedly learn even more ways to use props that you can replicate at home.